Air War Market Garden Volume 2 – So Near and Yet So Far.

104304

“They must have thought the entire American Army had jumped right on top of them”. This was the view of Captain Robert ‘Doc’ Franco of the U.S 82nd Airborne Division of his jump at Grave at the beginning of Market Garden. It’s also the point that the reader jumps straight into Volume two of Martin Bowman’s engaging four part study of Operation Market Garden with So Near and Yet So Far.

Here we encounter the drops of the 82nd at Grave and Nijmegen and those of it’s sister Division, the 101st Airborne around Eindhoven. In a series of sharp actions the bridges were taken which would allow XXX Corps to push North on its way to Nijmegen. That was only half of the job. As Maxwell Taylor, the Commander of the 101st observed the Americans then had to defend ‘Hell’s Highway’ against counterattack and closure by German troops in “a situation akin to the early American West were small garrisons had to fend off Indian attacks along the great stretches of road”.

Defend it they did. Just. So many Germans, in numbers unforeseen by Allied Intelligence, were present that the town of Best never was captured by the 101st or Guards Armoured. Best was a mini epic where Joe E. Mann, already badly wounded and without the use of his arms won a posthumous Medal of Honor by smothering a Stick Grenade with his body to protect his buddies.

Reuben Tucker, commander of the 504th PIR and roused his men to action with the rallying call of “Men, it’s open season on the Krauts; you know what to do”. They did and succeeded in capturing the long bridge over the Maas at Grave and a crossing over the neighboring canal at Heumen opening the road to Nijmegen.

Meanwhile at the Road Bridge in Arnhem, John Frost’s force that was predominantly drawn from the 2nd Battalion, Parachute Regiment fought on and fought hard whilst awaiting relief. Bowman’s writing on the Bridge Perimeter battle is as good as it gets as we see fighting on a room by room, floor by floor and house by house basis.

It’s poignant to read the account of Harold Padfield, 1st Parachute Squadron R.E on the fighting at the schoolhouse. Harold was at Arnhem for the 70th Anniversary last September and laid the wreath on behalf of the Veterans before sadly passing away in December.

The leadership at the Bridge was inspired. Digby Tatham-Warter led his men wearing just his Red Beret, then a Bowler Hat and carrying just his umbrella whilst coming under heavy fire and showing an utter disregard for his own safety. Frost was also similarly inspired. He was an officer of huge experience yet carried no personal weapon. He felt his job was to command and not get drawn into duels with the enemy. He also maintained his sense of humour as noted by the Padre, Father Egan. As Frost exited a toilet, unshaven, tired and dirty his face lit up on seeing the Padre and said “Father, the window is shattered, there’s a hole in the wall and the roof has gone, But it has a chain and it works”.

Bowman moves the action West to the drop of the 4th Parachute Brigade at Ginkel Heath. With one Parachute Battalion, the 11th immediately detached to head straight for the bridge the other two, the 10th and the 156 moved into the Wolfheze Woods. They didn’t get far, running into elements of the 9th SS on the Dreijenseweg and fighting a battle as they pulled back in the midst of a Glider Landing bringing in the Heavy Equipment of the Polish Parachute Brigade. The Poles, coming under fire from both the British and the Germans promptly fired back at both. It threatened to become a shambles yet a semblance of order was just about restored. However, you can’t disagree with one man of the 10th Battalion who observed “it was a real cock-up, but then again it was a real cock-up everywhere that day, I reckon”

With the attack towards the Bridge by the 1st, 3rd and 11th Parachute Battalions along with the 2nd South Staffordshire’s thwarted, the 1st Airborne Division realised that Frost had to be left to his fate at the Bridge. Instead, Urquhart knew he had to defend some kind of bridgehead on the North Bank of the Rhine and he decided to do that with a Defensive Perimeter in Oosterbeek. This is where Volume Three of the series will be set.

The chronology of the fighting in Arnhem on occasion wanders a little from its path and the timelines, although good really should be at the end as appendices. It’s a minor quibble though because as in the first book, Bowman compensates with his excellent eye for an anecdote and his use of the very best memoirs lends a certain authority to the account.

Air War Market Garden Volume 2 – So Near and Yet So Far (170 pages) is Published by Pen and Sword Books.

http://www.pen-and-sword.co.uk/Air-War-Market-Garden-So-Near-and-Yet-So-Far-Hardback/p/3860

The Last of The Few.

10,095 men of the 1st Airborne landed North of the Rhine. Nine days later just 2398 of them made it back across the river following Operation Berlin, the somewhat ironic codename for the evacuation of the 1st Airborne Division on the night of 25/26 September. It was a plan Roy Urquhart modelled loosely along the same lines as an earlier evacuation from the Great War at Gallipoli. The following is the report from 27 September 1944 by Stanley Maxted of the BBC who accompanied the Division throughout the Nine Days of Battle.


David Lord V.C and the Flight of KG 374.

220px-VCDavidSamuelAnthonyLord Air Ministry, 13th November, 1945. The KING has been graciously pleased to confer the VICTORIA CROSS on the undermentioned officer in recognition of most conspicuous bravery:— Flight Lieutenant David Samuel Anthony LORD, D.F.C. (49149), R.A.F., 271 Sqn. (deceased). Flight Lieutenant Lord was pilot and captain of a Dakota aircraft detailed to drop supplies at Arnhem on the afternoon of the 19th September, 1944. Our airborne troops had been surrounded and were being pressed into a small area defended by a large number of anti-aircraft guns. Air crews were warned that intense opposition would be met over the dropping zone. To ensure accuracy they were ordered to fly at 900 feet when dropping their containers. While flying at 1,500 feet near Arnhem the starboard wing of Flight Lieutenant Lord’s aircraft was twice hit by anti-aircraft fire. The starboard engine was set on fire. He would have been justified in leaving the main stream of supply aircraft and continuing at the same height or even abandoning his aircraft. But on learning that his crew were uninjured and that the dropping zone would be reached in three minutes he said he would complete his mission, as the troops were in dire need of supplies. By now the starboard engine was burning furiously. Flight Lieutenant Lord came down to 900 feet, where he was singled out for the concentrated fire of all the anti-aircraft guns. On reaching the dropping zone he kept the aircraft on a straight, and level course while supplies were dropped. At the end of the run, he was told that two containers remained. Although he must have known that the collapse of the starboard wing could not be long delayed, Flight Lieutenant Lord circled, rejoined the stream of aircraft and made a second run to drop the remaining supplies. These manoeuvres took eight minutes in all, the aircraft being continuously under heavy anti-aircraft fire. His task completed, Flight Lieutenant Lord ordered his crew to abandon the Dakota, making no attempt himself to leave the aircraft, which was down to 500 feet. A few seconds later, the starboard wing collapsed and the aircraft fell in flames. There was only one survivor, who was flung out while assisting other members of the crew to put on their parachutes. By continuing his mission in a damaged and burning aircraft, descending to drop the supplies accurately, returning to the dropping zone a second time and, finally, remaining at the controls to give his crew a chance of escape, Flight Lieutenant Lord displayed supreme valour and self-sacrifice. IMG_0316 David Lord was originally buried at the crash site of his Dakota, KG 374 at Reijerskamp Farm in Wolfheze. Buried alongside him are the fellows members of his aircrew, Flying Officer Alexander Ballantyne and Flying Officer Richard Medhurst who was on his first operational flight. Miraculously, one member of the crew, the Navigator, Flight Lieutenant Harry King survived after parachuting to safety when he was thrown from the disintegrating aircraft. He was picked up by men of the 10th Parachute Battalion but became a prisoner the following day. In a nearby plot, side by side lie the four Royal Army Service Corps Dispatchers who ignoring the chance to escape from the burning aircraft, ensuring it precious cargo of supplies was dropped before the Dakota went down. They are: Corporal Phil Nixon Driver James Ricketts Driver Leonard Harper Driver Arthur Rowbotham Lord Crew

20150412_113725

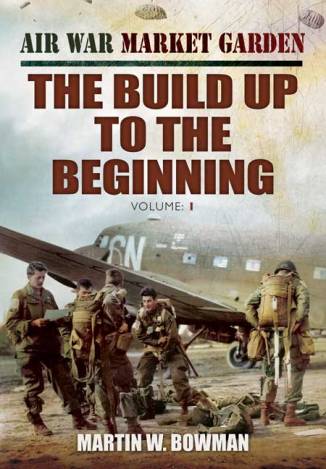
Air War Market Garden Volume 1 – The Build Up To The Beginning.

104302

Its been 41 years since Cornelius Ryan wrote his famous study of Operation Market Garden in A Bridge Too Far. Since then, hundreds of books have appeared, most of which concentrate on the performance, or lack of it depending on your point of view, of the 1st Airborne Division at Arnhem.

Less so though have been new works covering the entire operation and it is to Martin Bowman’s credit that he has attempted to bring those momentous days of September 1944 together in his four volume history Air War Market Garden. I would actually question the title itself as pleasingly, events on the ground are covered fulsomely in anecdote-rich detail.

Part one of the series is The Build Up To The Beginning which starts with a detailed overview of the rapid German reorganisation following the retreat from France. From there we see the frustration in England of the ‘Stillborn Division’, the name disgruntled members of the 1st Airborne gave themselves after operation upon operation (17 in total) were cancelled following the Allied landings in Normandy. This is summed up by Ron Kent of the 21st Independent Company who remarked “We were tired of fighting the Yanks in pubs..We were raring to go” or as John Hackett, commander of the 4th Parachute Brigade wrote in his diary “Drop near Maastricht…cancelled because the Yankee armour was moving to fast. Damn the Yanks”

As history proved the planning took much for granted and as Hackett observed “Many of the Planners at Airborne Corps were highly courageous boy scouts”. With drop zones at Arnhem up to 8 miles distant from the bridge the element of surprise was lost which in the eyes of Captain Eric Mackay of the 1st Parachute Squadron R.E meant that “we might just as well have dropped a hundred miles away from the objective as eight”

Bowman, as you would expect from an aviation historian, gives detailed coverage of the air plan and the reasons for the insertion of troops being spread over three lifts over three days. The author has a good eye for the anecdote and this comes to the fore during the first lift on Sunday 17 September as the vast air armada flew towards the Dutch Coast.

The second half of this book covers the landings of the British in Wolfheze and Renkum and the initial movement of the the 1st Parachute Brigade towards its objectives of the three bridges in Arnhem. Again, the anecdotes are good and one cannot question the memoirs and accounts Bowman has obviously referred to in his quoting of Urquhart, Frost, Dover, Hibbert, Cleminson, Vlasto, Sims and Gibson. What I would question the author on is a lack of chronological order in the landings as we are taken from Parachute drop to Glider landing to Pathfinder and back to Glider etc (the correct order is Pathfinders, Glider landings and Parachute Drop) and this may cause confusion for those not familiar to the story. Another minor quibble I would have is the use of timelines within the narrative. These are very good yet in my opinion should really have been included as appendices at the conclusion of the book.

As the 1st Parachute Brigade moved towards the bridge on its three selected routes we see the swift German countermeasures. As Willi Bittrich, commanding II SS Panzer Korps ordered it was “Necessary to strike immediately” and this was done, using the ad-hoc forces available. A good example would be of ‘one ersatz battalion which was composed of dismounted tank crews, fitters and logistic personnel reinforced with sailors of the Kriegsmarine’. Again, as Hackett (who would arrive in the 2nd Lift on 18 September) later observed “however empty of Germans and peaceful the scene appeared to be, if you touched an area important to them, the German reaction was swift and violent.” Give a fitter a MG34 and see what could happen..

Volume one ends with Frost at the Northern end of the Road Bridge. Volume two begins with the drop of the Screaming Eagles and the All Americans. I hope to be similarly pleased with the outcome.

Air War Market Garden Volume 1 – The Build Up To The Beginning. (192 pages) is published by Pen and Sword Books.

http://www.pen-and-sword.co.uk/Air-War-Market-Garden-The-Build-Up-to-the-Beginning-Hardback/p/3696

Make Every Shot Count.

101st-airborne-lg_Fotor_Collage

The following was a message that the commander of the U.S 101st Airborne Division, General Maxwell Taylor wrote and instructed to be read out to his men by every Jumpmaster and Glider leader shortly before emplaning for Operation Market on 17 September 1944..

‘Men, at last we have the real thing. We’re headed for the German lines of communication through Holland, to seize the important bridges on the route of the 2nd British Army to Germany. [Field] Marshal Montgomery’s troops at this very moment are surging forward and we must have the bridges if the British advance is to roll.

‘We must work fast. Every man must hit the ground running to his prearranged point of assembly. Every man must know the importance of the bridges at Son, Veghel and Sint Oedenrode. If you land near these bridges, stay there. Drive off any Germans who are about. Dig yourself in to cover the bridge with the fire of your weapon. Officers and demolitions experts; look for explosive charges and remove them. The bridges must be taken fast and taken intact.

‘I have talked to you before about supply discipline. Everyone in Belgium and Holland is short of food and ammunition. We must not lose a bundle or leave behind a ration. Make every shot count, especially those of the mortar squads and of the artillery. 

‘We go into this fight to help the British forward. We can give this help not only by seizing the bridges but by keeping the roads clear of prisoners, civilians and our own troops. We can help by covering the flanks of their columns and by preserving the wire lines and the boats and the barges on the canals. The British will help us by bringing us supplies and evacuating our wounded. And they will lend us a strong force of tanks to give us the type of support we had the from the American troops at Carentan.

‘We are the first American troops into Holland. To the Dutch and to our British Allies we are individual ambassadors of the United States. We must consider ourselves as such at all times.

‘My last word is this. We have a clear cut airborne job. It might be our last one, so it must be done well. I promise this Division the same aggressive leadership which carried it to victory in Normandy. I expect a D Day performance from every officer and man’.

With The Micks on The Road to Valkenswaard

One of the early stops at the beginning of the Leger Holidays Operation Market Garden tour brings us to the intimate setting of the Commonwealth War Graves Commission Cemetery at Valkenswaard.

IMG_20150321_105732

Here, right by the road which XXX Corps had to pass along on the way to Arnhem lies the final resting place of 222 men. 214 Soldiers, 2 R.A.F and 6 unknown. To a man they were killed in the immediate vicinity of the cemetery in the late Summer and Autumn of 1944. Again, as at all cemeteries visited, the Guests are not made to feel compelled to follow a guide around but to pay their own respects in their own particular ways. However, for those who wish to hear I do tell the story of the ambush of the Irish Guards shortly after the beginning of the advance of Garden

As depicted in the famous Brian Horrocks “…and mightily bored they’ll be”  scene in A Bridge Too Far the ‘kick off’ for the advance into Holland was to commence at 14.35. At this time came the call of ‘Driver Advance’ and with it, led by the Tank of Lt. Keith Heathcote of No.3 Squadron of the Irish Guards, began the advance of the 2nd Army on a frontage of one tank width up the narrow highway.

IMG_20150321_105746

With them came a supporting, rolling barrage from the Artillery, lifting 200 yards every minute ahead of them. All went well for the first 10 minutes until the Germans, lying concealed by the roadside, struck.

The first 15 Tanks were allowed to pass and then 9 were knocked out in quick succession. These being the last 3 Tanks of the lead Squadron and the first 6 of the following. They were knocked out by the Panzerfaust, the excellent shoulder-fired anti-tank weapon.

Sherman_Firefly_tank_of_the_Irish_Guards_Group

Seven of the men from the Irish Guards were killed that afternoon and today they are together still, in a row within the cemetery. There is a story to tell for them all but one, Bill Parkes, thanks to a rather harrowing photograph is better known than most. It’s Bill who was photographed hanging dead from his Tank. Like Frederich Kussin, another image to deliver the stark realties of war.

battle_marketgarden51

Parkes

Lest we forget.

The Death of a General

One of the more sobering stops on the Leger Holidays Operation Market Garden tour comes at the vast German Cemetery at Ysselsteyn.

Here, spread over 70 acres lie the neat, ordered graves of 31,598 men, most of whom died fighting in the Netherlands in the Second World War.

IMG_0798-0

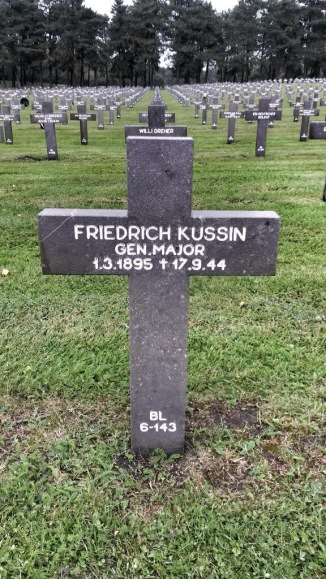
Whilst encouraging our Guests to wander around the cemetery and view it with their own thoughts and at their own pace I do make the point of pointing out three particular graves that are of interest to the story of the Battle for Arnhem. One of them being General Frederich Kussin.

  • IMG_0797

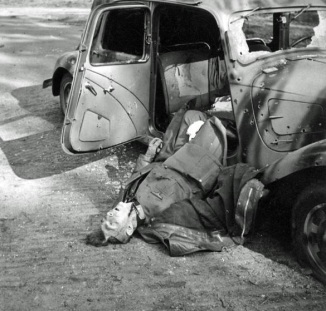
Frederich Kussin was the Town Commandant of Arnhem. When the initial landings commenced on 17 September he was tasked with reporting to Berlin the latest information on the intentions and movements of the 1st Airborne Division. A little like Roy Urquhart later in the day, Kussin felt that he had to see for himself what was happening. With his driver, Josef Wileke and an aide, Max Koster he sped up the Utrechtseweg in his camouflaged Citroen Staff Car first stopping at the Stationsweg in Oosterbeek.

With nothing unusual happening there he proceeded on to the Hotel Wolfheze (Leger’s base for our stay in Wolfheze) which was the Headquarters of the SS Panzer Grenadier Depot and Reserve Battalion 16 to brief its commander, SS-Haupsturmfuhrer Sepp Krafft. The time was 5.15pm and the sound of firing could be clearly heard coming from the surrounding woods. After an exchange of intelligence during this meeting Kussin decided to leave and return into Arnhem again along the Utrechtseweg. Krafft was against this move and advised Kussin to instead head back into the town along the nearby railway line instead. Kussin declined to heed this advice which was a decision that would cost him his life.

What Kussin couldn’t know was that the Utrechtseweg had been designated as ‘Tiger Route’ and was the road into Arnhem to be taken by the 3rd Battalion of the Parachute Regiment under Lt. Col. John Fitch. As The General came down the Wolfhezerweg to turn left onto the Utrechtseweg he ran into the lead elements of No.5 Platoon of the 3rd Battalion’s B-Company led by Lt. Jimmy Cleminson.

IMG_0801

Jimmy Cleminson explains “it [the car] appeared without warning, and the front men of each of my leading sections, who were just behind the junction, opened fire with Stens and rifles and riddled its exposed flank. It was all over in a flash. I saw a body leaning out of the door but pressed on, leaving Company HQ to clear it up”

image

It’s a stark image, much reproduced and remembered in more than a few memoirs of the battle. It’s a judgement call as whether to show the photo or not to a group on tour but, like Bill Parkes of the Irish Guards at Valkenswaard, something I feel is necessary in delivering the very real horror of war.

The Arnhem Report

Splendid Documentary on the making of the best war film of them all, A Bridge Too Far. It features pretty much all the cast, Dickie Attenborough plus input from some notable Veterans of Market Garden including John Frost, John Waddy, Eric Mackay and Andy Milbourne amongst others.


Dickie’s Door

It’s an iconic scene from an iconic war film. The speech made by Major Dickie Lonsdale in Theirs is the Glory.

It’s a classic but it’s also immediately obvious that Lonsdale wasn’t by any stretch of the imagination the greatest actor in the world. If you watch the clip carefully you can see him looking off-camera occasionally at something. The question is, what?

Easy, its this door, now on display at the Hartenstein Museum.

IMG_20150317_163806

Dickie kept fluffing his lines, which when you consider that he actually made the speech in Oosterbeek Church during the battle is somewhat remarkable. As a solution the Director, Brian Desmond Hurst, had the lines written on a door lying amidst the wrecked church. It’s this door which you can find at the Hartenstein. A unique artefact to a unique film housed amongst a unique collection.

It’s also worth pointing out that in the film Dickie Lonsdale is mentioned as being a Lieutenant-Colonel. This is an error. He parachuted in as the second in command of the 11th Battalion (Lt. Col George Lea was the C.O) and he didn’t receive his promotion until later in his career.

Eyes in the Sky – Aerial Reconnaissance Photography

One of my favourite resources is the superb collection of Allied aerial photo reconnaissance images at http://www.wwii-photos-maps.com/aerialnetherlands/September%201944/index.html

It’s a fantastic free-to-use asset and I can’t praise the guys behind the website enough. The following are three photos I use on the ground to give our guests a sense of where they are in relation to the events of September  1944.

wpid-17sep44-wolfheze-lzs-reijerskamp.jpg

Above: In the foreground is LZ-S and the gliders of the 1st Airlanding Brigade. The Horsa gliders nearest the camera are those of the 7/KOSB who were to move to the North West to secure the drop zone at Ginkel Heath. Slightly further away are the gliders of the 1/Borders who were to move southwards into Renkum. Across the road in the top right of the photo are gliders that have landed at LZ-Z bringing in units such as the Divisional Recce Squadron. Just visible in the distance is the Lower Rhine itself.

The burning buildings are the home for the blind and the mental institute. They were bombed on the morning of 17 September in the belief that they were housing German troops.

image

This next photo (above) is again taken over Wolfheze.  Dead centre of the photo alongside the railway line is the scene of the ambush of the Recce Squadron by the Krafft Battalion on 17 September. It’s also possible to see the track emerging from the culvert under railway embankment that was used by the 4th Parachute Brigade on its withdrawal into the Oosterbeek Perimeter on 19 September. Careful observers will also notice the marker panels on LZ-L to the east. This was the Landing Zone to be used to bring in the heavy equipment of the Polish Independent Parachute Brigade on 19 September.

image

This final photo shows in the centre DZ-Y, the drop zone used by the 4th Parachute Brigade on 18 September. The smoke is from fires started by incoming mortar and tracer fire as the zone was being attacked during the drop. To the bottom right can be seen DZ-X, used by the 1st Parachute Brigade on 17 September. To the centre right is the western edge of LZ-S.